 By Scott Will
Embarking on a complete home makeover is an exhilarating venture. The prospect of transforming a dated, cramped, or dysfunctional space into a personalized sanctuary brings a unique wave of excitement. However, without a structured approach, a whole-house renovation can quickly devolve into a chaotic, budget-draining ordeal.
A successful home transformation requires a meticulous balance of design vision, financial discipline, and strategic execution. Whether you are remodeling a historic fixer-upper or updating a modern space to better suit your family’s lifestyle, this comprehensive checklist serves as your ultimate roadmap from initial concept to the final, polished reveal.
Phase 1: Planning, Budgeting, and Design
The foundation of any successful home makeover is laid long before the first sledgehammer swings. Rushing into construction without a clear, documented plan is the most common reason projects exceed their timelines and budgets.
Define Your Vision and Project Scope
Before browsing paint swatches or ordering appliances, define what you want to achieve. Walk through every room of your house with a notebook and evaluate its current functionality.
-
Identify pain points: Note traffic bottlenecks, inadequate lighting, lack of storage, or outdated aesthetics.
-
Establish priorities: Differentiate between absolute necessities (e.g., repairing a leaking roof, replacing faulty wiring) and aesthetic desires (e.g., marble countertops, custom built-ins).
-
Gather inspiration: Create digital vision boards categorized by room to identify recurring themes in your preferred color palettes, materials, and architectural styles.
Establish a Realistic Budget
A budget dictates the boundaries of your project. Be completely honest about your financial limits and build in a financial safety net.
-
Calculate hard costs: These include structural materials, appliances, fixtures, flooring, and cabinetry.
-
Factor in soft costs: Account for permits, architectural fees, interior design consultations, and tool rentals.
-
Create a contingency fund: Allocate an additional 15% to 20% of your total budget for unforeseen issues, such as discovering hidden water damage, outdated plumbing, or structural deficiencies behind walls.
Assemble Your Team
Decide whether you will act as the general contractor, hire a full-service design-build firm, or manage independent subcontractors. For a complete home makeover, professional expertise is highly recommended for structural, electrical, and plumbing changes to ensure compliance with local building codes.
Phase 2: Structural Integrity and Infrastructure
It is tempting to focus entirely on visible aesthetics, but a beautiful room means nothing if the bones of the house are failing. Address the structural and mechanical systems first to ensure your cosmetic updates last for decades.
Exterior and Structural Shell
Ensure the envelope of your home is secure against the elements before working on the interior.
-
Roofing and Gutters: Inspect for leaks, missing shingles, or sagging areas. Replace or repair as needed, and ensure gutters divert water away from the foundation.
-
Foundation and Framing: Address any structural cracks, uneven floors, or wood rot.
-
Windows and Exterior Doors: Upgrade to energy-efficient models to lower utility bills and improve the home’s insulation profile.
Mechanical, Electrical, and Plumbing Systems
With the walls exposed during a major renovation, it is the ideal time to upgrade your home’s core infrastructure.
-
Plumbing: Replace outdated galvanized pipes with modern alternatives like PEX. Relocate supply and drain lines if your new layout changes the position of sinks, toilets, or showers.
-
Electrical: Upgrade your electrical panel if it cannot support modern appliance loads. Install dedicated circuits for high-draw appliances, add plenty of outlets (including USB/USB-C integrated ports), and rough-in wiring for smart home systems and lighting fixtures.
-
HVAC: Assess the efficiency of your heating and cooling systems. Clean or replace ductwork, and consider zoning systems or smart thermostats for optimal climate control.
Phase 3: The Interior Build-Out
Once the structural and mechanical elements are secure and have passed local inspections, the interior spaces begin to take shape. This phase transitions the house from a construction site to a liveable structure.
Drywall and Insulation
-
Insulation: Install high-grade insulation in exterior walls, attics, and crawl spaces to maximize thermal efficiency and soundproofing between rooms.
-
Drywall Hanging and Taping: Hang new drywall, tape the joints, and apply mud. Smooth, professionally finished walls are crucial for a flawless paint job later.
Architectural Millwork and Trim
-
Doors and Trim: Install interior doors, baseboards, window casings, and crown molding. These details establish the architectural character of the home, whether modern, traditional, or transitional.
-
Built-in Elements: Install custom shelving, window seats, or fireplace surrounds during this stage.
Phase 4: Room-by-Room Execution
With the shell complete, you can focus on the specific needs of individual rooms. Prioritize high-traffic, high-utility spaces first.
The Kitchen Makeover
The kitchen is the heart of the home and typically yields the highest return on investment.
-
Cabinetry: Install high-quality cabinets with soft-close hinges and smart storage solutions like pull-out pantries and deep pot drawers.
-
Countertops: Select durable materials such as quartz, granite, or quartzite that align with your cooking habits and maintenance preferences.
-
Appliances: Integrate energy-efficient, matching appliances that fit seamlessly into the cabinetry layout.
Bathroom Transformations
Bathrooms should blend spa-like relaxation with rigorous utility.
-
Waterproofing: Utilize advanced waterproofing membranes behind shower tiles to prevent mold and moisture damage.
-
Fixtures: Install low-flow toilets, water-efficient showerheads, and durable faucets.
-
Vanities and Storage: Maximize vertical space with recessed medicine cabinets and floating vanities to keep floor space clear.
Bedrooms and Living Spaces
These rooms should focus heavily on comfort, acoustics, and ambient control.
-
Lighting Layouts: Incorporate a layered lighting scheme consisting of ambient (overhead), task (reading lights), and accent (art highlighting) lighting.
-
Flooring: Install hardwood, engineered wood, luxury vinyl plank, or high-quality carpeting depending on the room’s function and foot traffic.
Phase 5: Finishes, Fixtures, and Details
The final phase is where your personal style shines. This is the culmination of all your planning and hard work.
Paint and Wall Coverings
-
Color Strategy: Use a cohesive color palette throughout the home to create visual continuity. Neutral tones on walls make spaces feel larger, while accent walls or bold wallpaper in powder rooms add personality.
-
Finish Selection: Use satin or semi-gloss finishes in kitchens and bathrooms for easy cleaning, and flat or eggshell finishes in bedrooms and living areas.
Hardware and Lighting Fixtures
-
Consistency: Swap out dated builder-grade hardware. Coordinate the finishes of door handles, cabinet pulls, and light fixtures (e.g., matte black, brushed brass, or polished nickel) across the home.
-
Switch Plates: Replace old, yellowed outlets and switch plates with modern, clean-lined options.
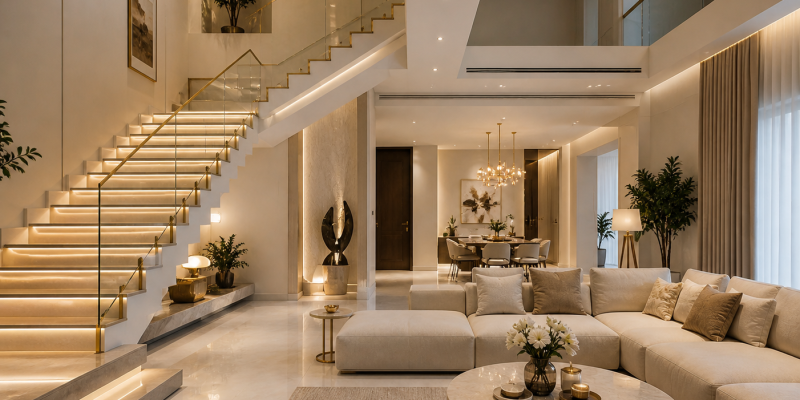
An elegant, modern living room featuring clean lines, a neutral color palette, layered lighting, and minimalist decor that exemplifies a successful home makeover.
Frequently Asked Questions
What is the correct chronological order to remodel a house?
The correct order always moves from structural to cosmetic. You should start with demolition and structural repairs, followed by upgrading mechanical systems (plumbing, electrical, HVAC) while the walls are open. Next comes insulation and drywall, followed by flooring, cabinetry, trim work, painting, and finally, installing light fixtures and hardware.
How do I maintain a cohesive design style across different rooms?
To create a unified feel, establish a consistent whole-house color palette consisting of two to three primary neutrals and one or two accent colors. Carry similar flooring materials through common areas, and match the metals or finishes of your hardware, door handles, and light fixtures from room to room.
Should I live in my home during a complete makeover?
If the makeover involves major structural work, kitchen gutting, or utility shut-offs, it is highly recommended to live elsewhere. The dust, noise, lack of functional bathrooms or kitchens, and constant foot traffic can cause immense stress. If you must stay, renovate in phases so you always have one clean, functional zone to retreat to.
How do I choose between repairing or completely replacing an old item?
Evaluate the item based on age, structural integrity, and cost. If a feature has historic value or is made of high-quality solid wood (like original hardwood floors or vintage solid doors), restoration is often superior. However, if items like old appliances, windows, or plumbing fixtures are inefficient or structurally compromised, replacement saves money on energy and repairs in the long run.
What permits are typically required for a home renovation?
Permits vary significantly by local municipality, but they are generally required for structural alterations (removing load-bearing walls), adding new windows or doors, footprint extensions, re-roofing, and any major modifications to the electrical, plumbing, or mechanical systems. Cosmetic updates like painting, flooring, and changing countertops rarely require permits.
How can I maximize storage space without adding square footage?
Look for underutilized vertical space. Install kitchen cabinets that extend all the way to the ceiling, utilize recessed shelving niches between wall studs in bathrooms, build custom storage units under staircases, and opt for multi-functional furniture, such as beds with built-in drawers or storage ottomans.